How to attach accessories in the camper
Every do-it-yourselfer can put dowels into a brick wall, but how do you do it in a mobile home? We show you how it works!
Attachment to decorative panels
There is no solid wood in mobile homes, only light furniture boards. That's a good thing, because you want to travel as light as possible. The disadvantage is that screws find less support. The decorative panels have a core of plywood or chipboard and are covered with a plastic decorative film. Basically the same as in any modern kitchen at home. Except that the manufacturers are trying to pay more attention to the weight here. The furniture boards are therefore somewhat thinner and made of lighter wood.

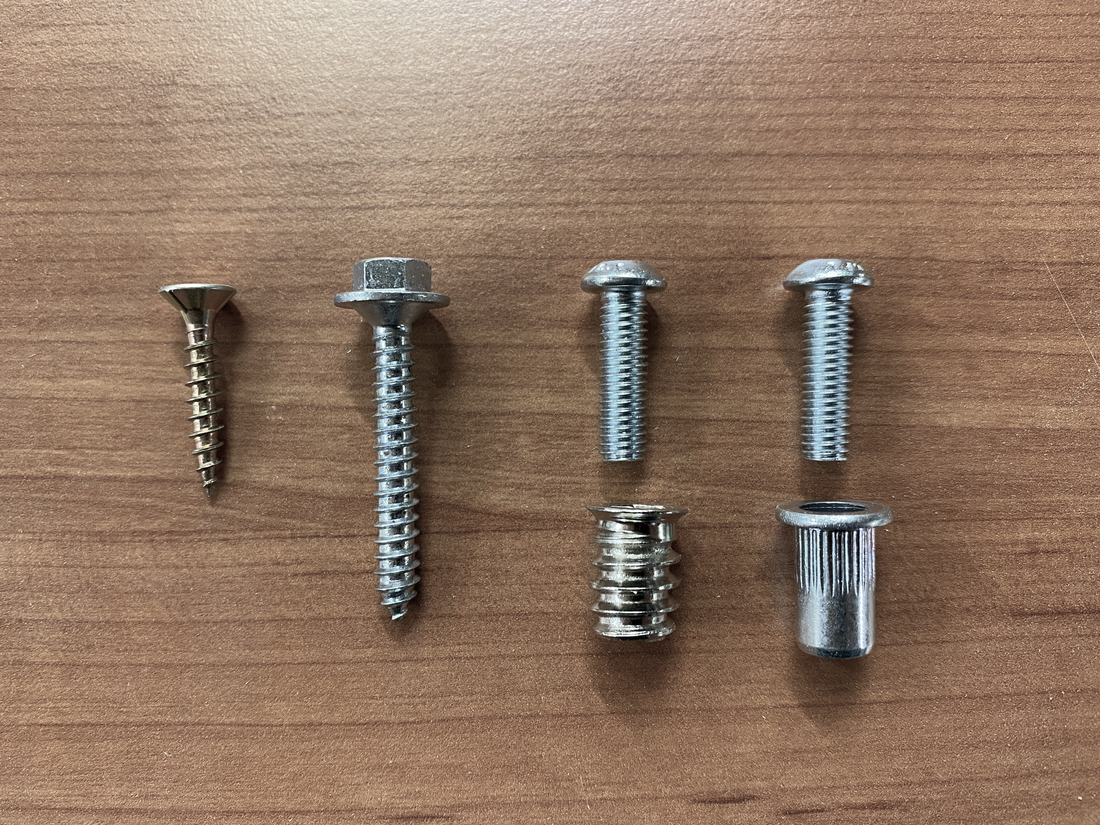
A single wood screw does not find much support here. If only because you can't screw them in very deep. It is therefore important to distribute the load over a large area. Many small screws in the group support each other and thus prevent large leverage forces from occurring. In addition, the screws should be as thick as possible. Thicker screws have more surface that jams in the wood. For example, if you want to hang up a TV mount, I would recommend 12 small spax screws rather than the standard 4. Each hole should be pre-drilled.

Screw-in nuts are ideal for plywood. Its outer diameter is approx. 12mm and thus offers almost 10x the surface area of a 4mm plywood screw. In addition, they look very good and can be used again and again. You just leave them in the wood and they don't stand out. If you consciously look into your rear garage, you will already find a lot of screws, cover flaps and connectors. They don't even stand out.
For the screw-in nuts, a hole must be pre-drilled that is as large as the inside diameter of the thread. With a 12mm screw-in nut, that is approx. 8.5mm. Before it is screwed in, the edge should be beveled slightly by hand with a countersink. Then the mother sits nice and flush afterwards.
If you also have access to the back of the wooden panel, you can drill all the way through there and work with threaded screws. With particularly large washers you can also distribute the force over a large area.
What's behind the felt in the rear garage?
We all know the black carpet. Behind this are usually thin plywood walls or, in the case of higher-priced mobiles, aluminum. Here you can simply turn small rakes in by hand for storage. Useful for flashlights. With heavier objects you should definitely set many attachment points that distribute the force over a large area.
Attachment to the vehicle floor
The vehicle floors in motorhomes almost always consist of a sandwich panel. The top layer is mostly painted fiberglass composite or aluminum checker plate. In the middle is foam that provides the necessary insulation and on the bottom is fiberglass. These fiberglass layers are very thin. A wood screw would hardly have anything to hold on to. However, you can work excellently here with threaded screws. The M6 size is sufficient for most applications. 
To do this, simply drill through the entire sandwich panel until you come out again under the vehicle. Most people underestimate how thick the soil is. Typical is 50mm. So it is best to use 70mm long screws. They can also look out from under the vehicle.

Here, too, it is important to distribute the forces over a particularly large surface. For example by using large washers. An M12 disc has a diameter of 37mm. It would be better to use a flat connector from the hardware store. They are then about 60x90mm in size. Our floor mounting kit includes custom made 90mm diameter stainless steel washers and matching screws.
Of course, all holes that go to the outside must be sealed. Sikaflex 522 is a good product for this. Simply apply generously and make sure when you put it on that it presses out evenly on all edges. Then you can be sure that it is tight again. Even with the leak test you can easily see that everything is OK. The risk of water entering the vehicle floor is low anyway. As a rule, there is only splashing water and that only when driving in the rain. Water can get in much more easily on the roof because it is exposed to every rain shower and the water can collect in puddles. It simply drips off under the vehicle.
Can you hit a line when drilling in the ground?
Not really, if you follow these tips:
- Check under the vehicle beforehand to see if there is a water tank or something similar. Usually everything is free in the area of the rear garage.
- In the rear garage, there are usually only cables for the rear lights. But they are visibly installed in almost all mobile homes. There is no other technology back there.
- We are aware that Hymer has installed underfloor heating in the rear garage of some vehicles. No holes should be drilled here.
- If you have any questions about the substrate, it is best to ask your dealer! They drill holes in similar mobile homes every day and know their way around very well.
Gluing instead of drilling
This is also a good alternative. Modern assembly adhesives hold extremely well and they distribute the force over a large area. Their only disadvantage is that they cannot be removed without leaving any residue. A screw leaves only a small hole. This can be easily hidden with cover caps or carriage bolts. But assembly adhesives leave large traces. If only because you have to roughen the surfaces to be glued with sandpaper beforehand. But we also have a tip here: You can simply stick a checker plate or a suitable decorative panel over the corresponding surfaces. This is not particularly noticeable in rear garages, because the walls there are already very crooked and full of technology. This is how everything looks pleasing afterwards.
We always recommend using black mounting adhesive. It is least noticeable when it quilts out at the edge. If something goes wrong, most adhesives can be removed with isopropanol. Water or soap does not help here.

Attachment to lashing rails
Many mobile homes have already installed lashing strips and these are very good fastening options. A few fastening eyelets are usually already supplied. But you can also buy more in different versions in the accessory shops. Lashing straps are flexible and usually have to run straight through the rear garage. But you can also make small brackets out of steel angles to create rigid connections. For example to a Mobilade or to a washing machine. It's a bit fiddly, but you don't have to drill any holes. 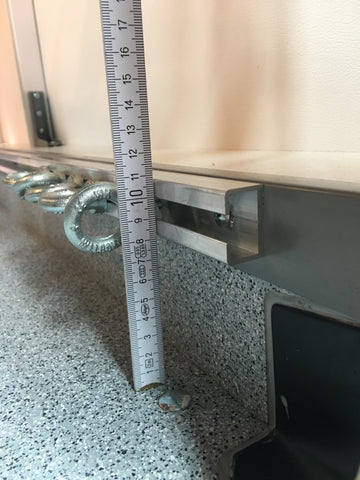
Incidentally, lashing strips are also best attached with assembly adhesive. Such an aluminum strip can withstand a lot, but it has to be connected to the weaker subsoil over a large area.
Fastening in sheet metal
Only rivets and rivet nuts can be used for thin sheet metal. For example in the vehicle body of vans or in checker plate floors. For this purpose, a hole is pre-drilled that is big enough for the rivet to just fit through. They are then pressed with rivet pliers. This gives a high-strength connection that does not come loose even with vibrations.
Here you should always make sure that the rivets are not exposed to any leverage, because the thin sheet metal can easily bend. So it is best to set several rivets that support each other. Just like the little screws.
We recommend 4-5mm diameter for rivets and size M4-M10 for screw-in nuts. You should always pay attention to the length. Body sheet metal is 0.7mm thick and floor panels 2mm. The required rivets are significantly longer at 6mm and 8mm.

Do you have questions? Feel free to leave us a comment!